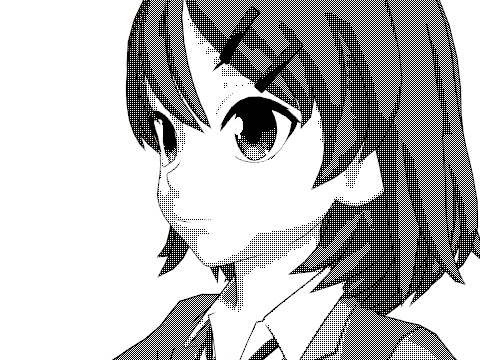
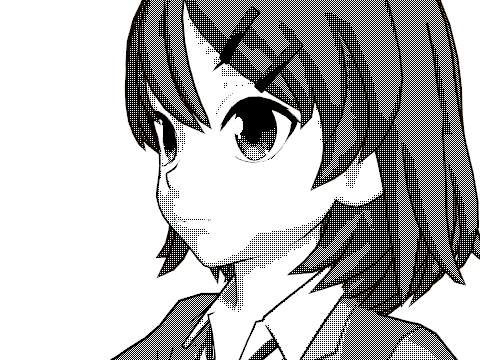
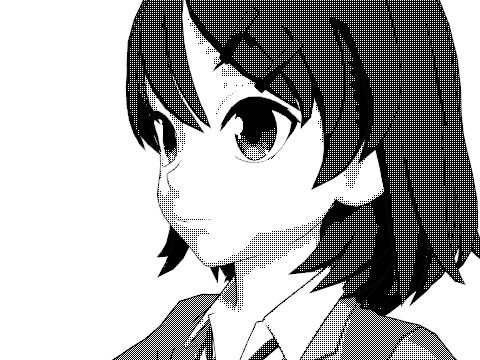
Unityでコミック風プロ生ちゃん
プロ生ちゃん Advent Calendar 2015 6日目の記事です。qiita.com
シェーダーでアニメ風が出来るなら、コミック風もできるかな。
少し前にそう思って調べたのですが、これだ!というのがありませんでした。
明るいところは白く、暗い部分はスクリーントーンみたいになってくれるといいのですが。
手書き風シェーダーはあるんですが、コミックとは違う。
https://www.assetstore.unity3d.com/jp/#!/content/40360
https://www.assetstore.unity3d.com/jp/#!/content/12465
色々調べていたところ、スクリーントーンのような表現は「ディザリング」というキーワードで探すといいことがわかりました。
そして以下ブログで素敵なシェーダーのソースが公開されていました。wonderpla.net
これをプロ生ちゃんに適用すると、こんな感じ。

※テクスチャはアニメ風の時とおなじく、グラデーションなどは付けずベタ塗りにしているものを利用しています。
※また、目のハイライトのみ、Unlit/Transparent Cutoutを利用しています。
※Dither Matrixにbayer.pngを指定するのを忘れずに。
これにアウトライン描画の処理を追加すれば、コミック風になりそうです。
また、陰影の強さは外部のライトの光の強さで調整できますが、これだと全体的にしか調整できません。
特定パーツだけ濃くしたい・薄くしたい、といった場合はテクスチャを直接いじるしかないのですが、それは面倒なのでMain Colorというパラメータも追加し、個別でテクスチャの色味調整が出来るようにしました。
ソース
元ソースに色味の調整を追加
Shader "Custom/OrderedDitheringEX" {
	Properties{
		_Color("Main Color", Color) = (0.5,0.5,0.5,1) //★追加
		_MainTex("Base (RGB)", 2D) = "white" {}
		_MatrixWidth("Dither Matrix Width/Height", int) = 4
		_MatrixTex("Dither Matrix", 2D) = "black" {}
	}

	SubShader{
		Tags{ "RenderType" = "Opaque" }
		LOD 200

		CGPROGRAM
		#pragma surface surf Lambert vertex:vert finalcolor:mycolor

		float4 _Color; //★追加
		sampler2D _MainTex;
		int _MatrixWidth;
		sampler2D _MatrixTex;

		struct Input {
			float2 uv_MainTex;
			float4 scrPos;
		};

		void vert(inout appdata_full v, out Input o) {
			UNITY_INITIALIZE_OUTPUT(Input,o);
			float4 pos = mul(UNITY_MATRIX_MVP, v.vertex);
			o.scrPos = ComputeScreenPos(pos);
		}

		void surf(Input IN, inout SurfaceOutput o) {
			half4 c = tex2D(_MainTex, IN.uv_MainTex) * _Color;  //★修正
			o.Albedo = c.rgb;
			o.Alpha = c.a;
		}

		void mycolor(Input IN, SurfaceOutput o, inout fixed4 color) {
			// RGB -> HSV 変換
			float value = max(color.r, max(color.g, color.b));

			// スクリーン平面に対してマトリックステクスチャを敷き詰める
			float2 uv_MatrixTex = IN.scrPos.xy / IN.scrPos.w * _ScreenParams.xy / _MatrixWidth;

			float threshold = tex2D(_MatrixTex, uv_MatrixTex).r;
			fixed3 binary = ceil(value - threshold);
			color.rgb = binary;
			color.a = 1.0f;
		}
		ENDCG
	}
		FallBack "Diffuse"
}
色味の調整+アウトライン処理の追加
Shader "Custom/OrderedDitheringEX Outline" {
	Properties{
		_Color("Main Color", Color) = (0.5,0.5,0.5,1)
		_MainTex("Base (RGB)", 2D) = "white" {}
		_MatrixWidth("Dither Matrix Width/Height", int) = 4
		_MatrixTex("Dither Matrix", 2D) = "black" {}
		_OutlineColor("Outline Color", Color) = (0,0,0,1)
		_Outline("Outline width", Range(.001, 0.03)) = .005
	}

	SubShader{
		Tags{ "RenderType" = "Opaque" }
		UsePass "Toon/Basic Outline/OUTLINE"
		UsePass "Custom/OrderedDitheringEX/FORWARD"
	}

	FallBack "Custom/OrderedDitheringEX"
}
※Toon/Basic OutlineシェーダーのOutline描画処理を参照しているため、利用する場合はプロジェクトにToon/Basic Outlineを含めてください。
適用後

Outlineの調整で線を細く/太く

Main Colorの調整で特定パーツの色を濃く/薄く

色々調整して楽しんでみてください。